Sunday, January 26, 2014

Beginner Gluten Free Meal Planning

Planning meals can be difficult, especially if you've never really cooked.

Breakfast is a piece of cake; I mastered that very quickly. Dinners are where I struggled. Incidentally, they're the most important part of my Celiac life. See, Dinners are quickly turned into lunches when properly planned, which makes life so much easier.

For years, I awkwardly prepared food, with no real direction. I'd wander around the store, buying things that looked good. Inevitably, food would spoil or I'd make a meal and the flavors wouldn't really jive.

It probably didn't help that I'm not much of a recipe follower; I have the uncontrollable urge to substitute.
My ultimate goal is to be one of those people who can take what's in the fridge and come up with something delicious. I suppose I could rephrase that to say that my ultimate goal is to cook like my mother, who has mastered the art of taking random ingredients and throwing them together into a mouthwatering masterpiece.

Ironically, my culinary success started when I started planning my meals in advance. It's a good way to build a solid cooking foundation.

I started simply with this basic meal formula:
A. Meat
B. Vegetable
C. Grain

Groundbreaking, I know. But, it works when you've got no other inspiration.

I took inspiration from the grocery store's weekly sale flyers. I sat down at the table with the flyer and made myself one of these:

http://www.pinterest.com/pin/161707442839831926/

And then I followed these steps:

A. Pick a meat that's on sale. Write it down for Monday. Do the same for the rest of the days of the week with a different sale meat. Don't think about it. Just write it down. Monday, we're having chicken. Tuesday, beef. Bam. The basis for each meal is set.
  • Pick a way to prepare that meat. This is where I would use the magic of Google if I didn't have anything already in mind. Keep it simple-- no mixes or condensed soups, which frequently contain gluten anyway. This is where I will again mention the wonders of fresh herbs. And the crock pot.

B. Pick a vegetable that's on sale. Write that down for Monday. Do the same for the rest of the days of the week with a different sale vegetable. This is a great way to eat seasonal, and to try new things. If there are no desirable veggies on sale, grab a bag of frozen veggies.
  • Pick a way to prepare that vegetable. Generally, steaming or sauteeing with a bit of butter, garlic, & salt is a winner. 

C. Pick a grain to pair with the meal.
  • Noodles, rice, or mashed potatoes are good standard options.
See, the hard part is done. Once the basic blocks of the meal are decided, it's easy to build a variety of meals around it.


Embellish the meals by adding other things that are on sale in the flyer. If peppers are on sale, they get incorporated into Monday's chicken and suddenly stir fry with broccoli and rice is on the menu.

I do try to incorporate things that I already have into the week's menu. For example if we've got an excess of cheese, I'll make sure to use it up by making mac & cheese or cheesy rice.

And yes, I do literally write this stuff down. Here is our menu for the last two weeks.

 
For instance, on Sunday we're having steak and baked potatoes (which will be topped with cheese, chives, butter, and sour cream).
I can use the leftover sour cream for the beef stroganoff on Monday, and I bought an extra potato to use in Wednesday's vegetable soup, along with the leftover chives.

I don't always plan meals that use up each other's leftovers every week. Sometimes, it just happens that way and it's an added bonus.

Also notice that we didn't get around to eating the vegetable soup and sandwiches the first week, so that got transferred over to the next week.
Also, it's easy to switch around the days. If we feel like eating pork tacos on Tuesday, we would just eat shrimp on Wednesday. Either way, there's enough food for the week.

There it is. Beginner meal planning.

Sunday, January 19, 2014

Clever Leftovers: Chicken Pot Pie

What to do with a ton of leftover roast chicken? Pot pie, baby.


This is the first time I've tried Pillsbury's gluten free pastry dough.

As you can see, the results look pretty good.


Start by rolling the dough according to the package directions, and placing a layer in the bottom of an 8-inch pie pan.

Then, work on the filling-- these are all approximate amounts, as leftovers rarely yield exact amounts, and the recipe is flexible. Throw in whatever you've got, as long as it doesn't overflow the pan.

2 c. shredded cooked chicken
1/2 c. frozen peas
1/2 c. cooked chopped carrots
1 c. fresh chopped kale
2 c. gravy (made from the drippings of the roast chicken, thickened w/ corn starch & corn flour)

Mix it all up and add it to the pan. Cover with a second layer of pastry dough, and pierce the top a few times with a fork.

Bake at 375 for 45 minutes, or until the crust has browned evenly.
Be prepared for your gluten-loving husband to go back for thirds. And you may even find yourself picking at the bits that fall out of the crust in the pan.


P.S. this freezes great; just thaw before putting it into the oven.
P.P.S. This pot pie is fantastic with a biscuit crust

Sunday, January 12, 2014

My Favorite GF Flour Blend

One of the first things that every newly diagnosed Celiac wants to find is the all-purpose gluten free flour blend that works for them. It seems like everyone has their favorite, and this is mine.

I've been through every type of gluten free flour and back, and this is what I've successfully used for years now.


When developing it, I had a few requirements:
1. Each flour had to be mild-tasting so that it wouldn't alter the taste of the final result.
2. Each flour had to be easy to find.
3. Each flour had to be inexpensive (relative to other GF flours)
4. The whole blend had to be as whole-grain as possible, without yielding a dense end product.

The blend that I've settled on, and have been very happy with, is this:

1 bag of Bob's Red Mill Brown Rice Flour
1 bag of Bob's Red Mill Sweet Sorghum Flour
1 bag of Bob's Red Mill Potato Starch
1 Tablespoon Xanthan Gum

This all gets dumped into a container and shaken around to mix.

I've successfully used this mix as a substitute for wheat flour in many recipes, as well as other gluten-free recipes that call for other types of flour. Whatever it calls for, I just use my blend.

Gluten Free Cornbread


My husband ate about half of this in one sitting. While I served it with chili, it doesn't matter.

This recipe is adapted from Carol Fenster's 1,000 Gluten Free Recipes. Although I've changed her recipe a little by substituting buttermilk for the milk + vinegar, and I use my own flour blend, I don't feel it's different enough to post it on the internet.

However, I do think it's good enough to tell everyone about.
So, if you see this book, pick it up and check out the cornbread recipe.


Thursday, January 9, 2014

On the Menu: Fish & Squash

On the menu tonight: Fish & squash.

This is really quick. It was done in the time it would take to order a pizza and have it delivered, but way healthier. Bonus: lunch leftovers, which are kind of a necessity when you're eating a gluten free diet, and on a budget.

There are basically three components to every dinner I make: meat, veggie, sometimes a starch, and a salad. [I haven't really ventured into meatless territory because I'm still getting used to cooking for a husband that likes his meaty protein. I do, too, but I'd also like to mix it up every once in a while.]
I like to make fish when I don't want to spend much time in the kitchen, because it cooks very quickly on the stovetop.


  • The fish was bought from the fish counter at the grocery store, already seasoned. On sale, it was cheaper than frozen, and I don't have to worry about how to season it. Cooked in a pan according to the package directions.
  • Veggies- Fresh zucchini and yellow squash, cut up kinda thin. After the fish was cooked, I added a bit of rosemary olive oil to the pan, and tossed in the veggies with a sprinkle of salt & pepper. These veggies also cook up quickly, so they were done by the time the fish was down to eating temperature. Next time I'd like to grate a little bit of fresh parmesan on top. 
    • A little note about parmesan cheese: Invest in a chunk of the real stuff, and grate it off the chunk as you need it. It's infinitely better than that nasty powdered stuff, and it keeps for a while in the fridge.
  • Salad- we're eating salads with every dinner now in an effort to eat more vegetables. This particular salad consists of a bagged spring medley, plus pieces of kale and shredded carrot. (We're digging caesar dressing lately.)

Wednesday, January 8, 2014

Roasted cabbage

So part of the New Year's tradition is to eat cabbage, as it's supposed to bring money in the new year. I'm not one to shun a superstition that might bring some extra cash flow.

So even though I'd never cooked cabbage before, I bought a head.

I've heard of roasting brussels sprouts before, and since cabbage is just a large brussels sprout, I figured roasting would be pretty good. I was right.

Roasted Cabbage.

Preheat oven to 450 degrees.
Remove the outer leaves from the cabbage. Slice into wedges and lay on a cookie sheet, careful not to disturb the layers.
Drizzle with olive oil and sprinkle with salt and pepper. Roast for 15 minutes on each side.

The inside gets tender while the outside leaves get crispy. Mmm.

Serve with black eyed peas and, possibly, sauteed shrimp.

Wednesday, January 1, 2014

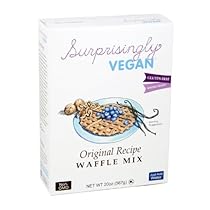
Surprisingly Vegan Waffles

http://www.surprisinglyvegan.com/shop.html
I received this waffle mix as part of a gluten free subscription pack my mom got me for my birthday. I usually make waffles from scratch and would never buy a packaged mix, but I figured since these were here I'd give them a try. Plus, I'm out of flour.

Overall, these are terrible. Not surprisingly.

From the moment I opened the package, I was skeptical. It comes in a vacuum-packed bag, which turns the mix into a crumbly brick. So, I transferred it to a ziplock bag and smashed out all the lumps. Or, so I thought. When I measured the mix into the bowl and added the water, I had to stir out quite a few more lumps. And yes, the package was well within the "use by" date.

The instructions tell you to wait for 5 minutes while the batter thickens, so I did that. Except it was less like thickend and more like snotty. The batter definitely took on a thicker, yet slimy-ish texture.

Still, I pressed on and poured it onto the waffle iron. The first batch apparently didn't cook long enough, because the outside was browned while the inside was still goopy and raw.

The second batch cooked enough and I let it cool before breaking it open. Still, they had that telltale rubbery texture indicative of a bad gluten free product. Not something I would ever look forward to eating.

At this point, I'm getting really tired of shitty gluten free products. I've wasted so much money on products that I think will be great, only to be disappointed. I want to tell companies not to market something unless people will actually want to eat it-- Quit exploiting our desire for gluten free normalcy with your false hopes! Don't just jump on the gluten free bandwagon to taunt those of us whose lives depend on it!

At the same time, I'm also glad that I have a good waffle recipe to use. So while the rest of this waffle mix will hit the trash soon after I hit Publish, I can still continue to enjoy edible gluten free waffles.